Set-up Penetration Testing server on AWS
Amazon Web Services (AWS) is a great resource to try and learn cloud concepts and later setup your own infrastructure on cloud. Since very long, AWS is providing 1 year of free usage for a set of cloud services.
If you own one laptop and want to have another machine for testing, you either need to install Virtualization software (Virtual Box, VMWare, etc) or you can use the free tier of AWS. Amazon EC2 (Elastic Compute Cloud) can be used to setup your own instances on the cloud to do this. While having a penetration testing machine on AWS, you need to take care of some points:
- You can run penetration testing only on your own AWS resources
- The permitted resources/services which can be pen-tested without prior approval include EC2, CloudFront, RDS, etc. Refer here for a list of permitted and non-permitted services
- For any other scenarios or simulated events, you need to take prior permission from AWS for your activity. You can refer here for more details
- It also means that, you can test only the infra/services that you own, not the AWS services or AWS infrastructure — means if you are owning an Ubuntu EC2 instance, you can test only the resources hosted on that Ubuntu server
For this topic, we would setup a penetration testing server on AWS and later attack it using our own machine. We would install web server and other vulnerable components on the server so that we can practice our penetration testing skills. If required, this could also work as a honeypot for analyzing the attack patterns by different attackers.
What are the benefits of using an AWS instance for penetration testing? #
- You can get a public IP for your testing
- If you wish to setup your machine as a honeypot, it can be easily done through this
- The internet connection would be much faster for the AWS instance
- Very easy deployment and termination of instances
- Lots of base OS available, including Ubuntu, Windows Server, Amazon Linux, Red Hat, SUSE
If you don’t have an account on AWS, you can create one and AWS would provide you some services for free for 1 year. There are limits to what services and what configurations can be chosen. For our current activity, we would be working with Amazon EC2. For EC2, there are some limitations for the Free-tier — you can only use 750 hours of instance per month, only 30GB of storage and limited instance types. But this would be sufficient for our testing scenario.
To create an EC2 Ubuntu instance on AWS, do the following: #
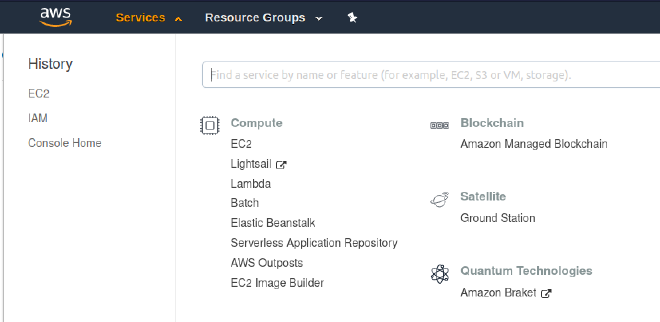
- On the top bar, go to Services and click on EC2
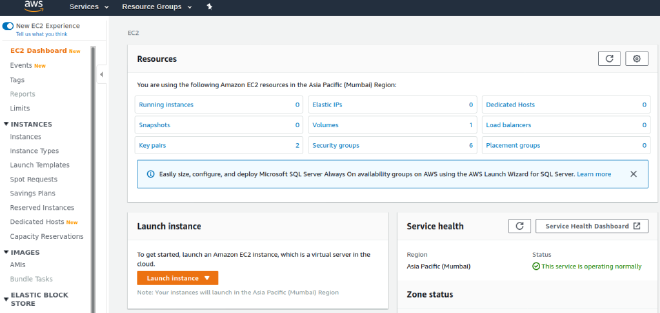
- This would open the EC2 Dashboard as shown below
- To launch a new Instance, click Launch Instance
- You would be given a list of various AMI (Amazon Machine Image). The images eligible for free-tier would be marked accordingly. We would select Ubuntu Server 18.04 from the list
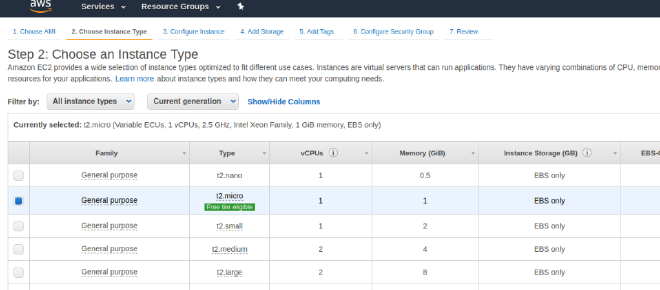
- Next step is to select the instance type. Here, since we are using the free-tier, we would select t2.micro which is eligible for free tier
- For the step to configure instance details, we can use the default values and move to next step for adding Storage. Free-tier allows max 30GB of storage, select any number below 30 here.
- Add any Tags if you want, on the next step. Tags are for identifying different instances. For example, you can tag all your production web servers as ‘prod-web’ and all the UAT web servers as ‘uat-web’.
- Security groups – this is an important configuration. This would work like a firewall and allow only the listed IP/ports. If you want to configure a HTTP/S web server, you can allow Port 80 and Port 443. For this case, you have to select Type as HTTP, Protocol as TCP, Port Range as 80, Source as Anywhere (this would allow all IPv4 and IPv6 ranges to access your machine with port 80). Do the same for port 443 and 22. We require SSH access of this machine, hence we are allowing port 22 also.
- We are now done with the launch configuration. Click on Review and Launch — it would launch the instance.
- When we click on Launch, it asks us to select or create a key-pair. This key pair is used to connect with our instance using SSH. Since this is the first time and we don’t have any keys, we select to create a new key pair. Name the key pair and download the key (that would be a .pem file). This key is most important for the security of your instance — never share this key with anyone or download it at a shared location.

For accessing the instance, you can go to Instances from the left menu and see your instance. You can connect with your instance by using (1) Standalone SSH client, e.g. putty or your Linux terminal, (2) Session Manager or (3) Browser based SSH connection. Here since I am using Linux machine, I would use the first option.
The command to connect with the instance is:
ssh -i "<key-file>.pem" ubuntu@<ip-address-of-your-instance>
Replace the name of key-file and the IP address of your instance. You can always get the ready-made command when you click on Connect button from the Instances dashboard. When you use this key for the first time, you also need to give the following command so that it can be viewed by SSH:
chmod 400 <key-file>.pem
Now the Ubuntu instance is ready! Connect to the instance and move around in the system.
Apache would be already installed in this image of Ubuntu. Start the Apache server and confirm it by putting the AWS instance’s public-IP in your browser.
We can now install different vulnerable applications. Note that these are intentionally vulnerable and hence will get breached by bots or attackers. Take proper care while connecting to your instance if you are opening up your instance with vulnerable applications. You would also need to open proper ports from Security Groups of your EC2 so that your machine can connect with the respective applications.
- DVWA: Download the source from their official Github and follow the installation instructions
- Webgoat: Download the latest release from their official Github and follow the installation instructions for Standalone version
- OWASP-Juice-shop: Grab the latest release from here and follow this installation guide for installing it on our Ubuntu instance
The Ubuntu instance is ready for testing! You can use your local machine (fire up Metasploit, Nmap, Burpsuite, whatever tools you find comfortable) to test the vulnerable applications. Just take care, not to attack any other instance or underlying AWS services without prior permissions.