Common problems during initial Honeyd configuration
Honeyd is a small daemon for Linux (now also available for Windows) to simulate multiple virtual hosts on a single machine. It is a kind of an interactive honeypot. The latest release can be downloaded from Honeyd release page.
For my project, I have been working with honeypots, and Honeyd is one of them. During the initial stage, I faced some problems while starting the basic setup of some personalities with Honeyd. Here I recall those problems and some misconfigurations which can result in errors (mainly: config file parse error) and can be a problem for first time users.
The command to start honeyd daemon through your terminal is:
# honeyd -d -f honey.conf
Here, honey.conf is my configuration file and -f is used for pointing to that file. -d is used to tell the machine to run honeyd as a daemon.
eth0 not an IP #
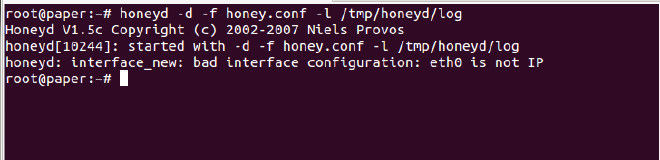
Reason: Your ethernet connection does not have an IP address.
When you are testing on a single machine, the first thing you need to do is give your interface an IP address. The below command will take care of it. Replace ‘eth0’ with your respective interface.
# ifconfig eth0 192.168.1.1
(If you are using a different interface like eth2, you need to mention while starting honeyd. Should be -i
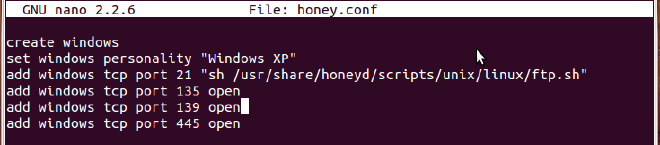
Now, here is my sample configuration file:
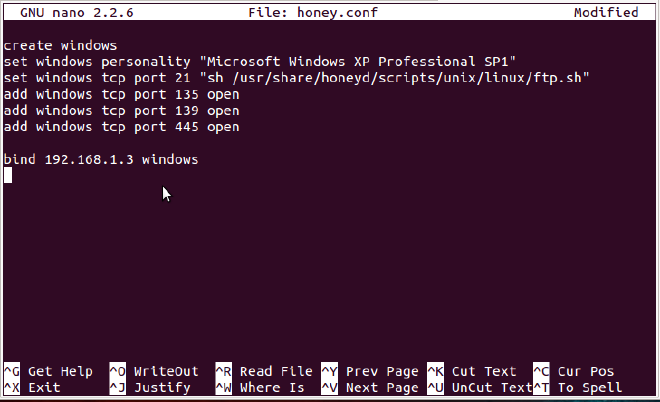
Lets disect the file line by line.
1: creates a personality, and we will refer to it as windows.
2: name the personality as Windows XP, means someone who is scanning our honeypot will find it so.
3: including the ftp.sh file, which will simulate a FTP server.
4,5,6: opens the tcp ports 135, 139, 445.
7: bind the ip address to our personality.
Try running the honeyd while using our honey.conf file. Error?
parsing configuration file failed #
Now, during my initial day I had taken help for the FTP server from a blog on linux.com, “Weekend Project: Use HoneyD to fool attackers“. As it is a tutorial on linux.com, there are more chances that this post will be on top of your Google search for HoneyD on Linux. My point is, they have simplified the process of configuration, explained well, but there is one small error. I have highlighted it in the below screenshot:
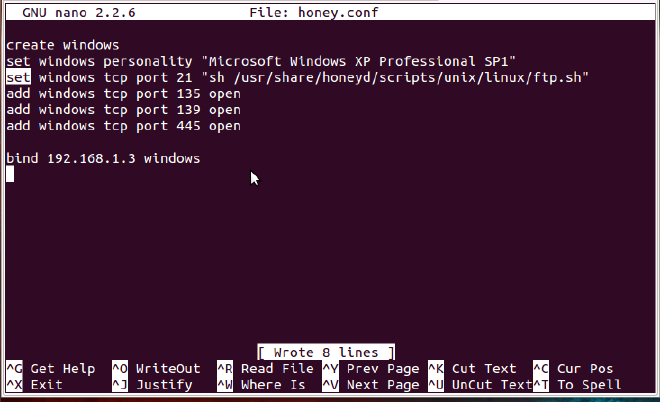
The error that you will get will be: parsing configuration file failed. It will be on line:3. Set is used for setting our personality to some predefined condition, while add is used to provide something extra. If you are using set for providing preloaded scripts, then surely you will face parsing error.
Solution: replace set with add.
This should be your configuration:
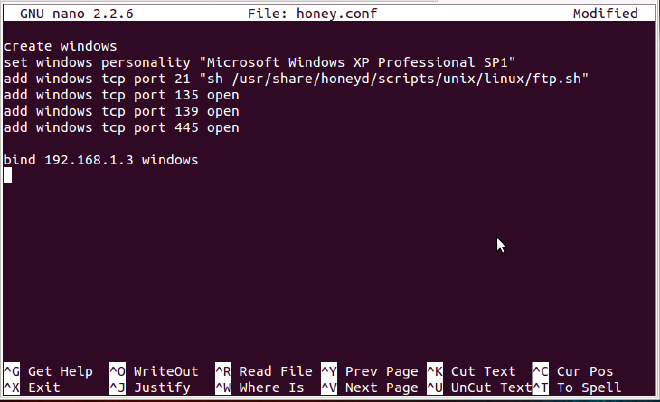
Now, your honeypot will start its work without any error. Time to rejoice? Kind of.
Logging #
How to log any attacks or scans on your honeypot? Use -l <filename>. Normally, it is logged under a directory named honeyd under the /tmp directory. If you dont have that directory, create it with mkdir.
The command I used for logging the attempts was:
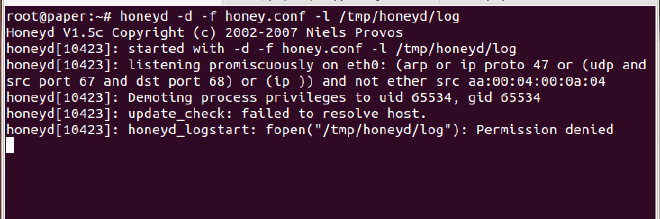
Ah, permission denied! How to solve this? You guessed right – the file is write-protected, and hence give the write permission to everyone. Use chmod command.
# chmod 766 /tmp/honeyd/log
Can’t detect Ping? #
As you’ve seen the configuration file, I have not yet given any MAC address to my honeypot. Hence, it is not yet accessible to the outside world. Try pinging from a different computer, it will fail.
Provide a MAC address to your honeypot with the line as shown in the below screenshot. Check the MAC address of your host machine, and give the address of your honeypot as near as possible to the host address.
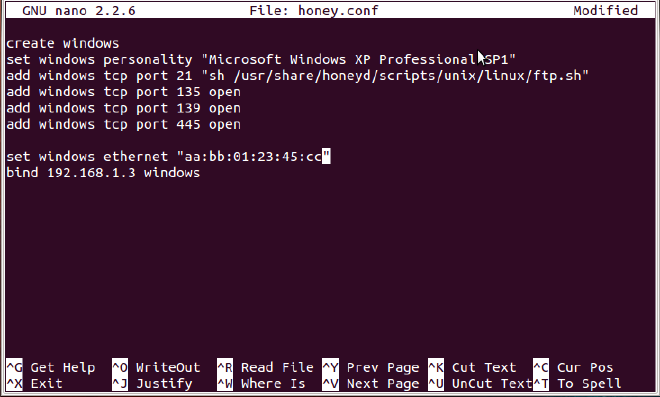
It is good if you have given the personality name as “Microsoft Windows XP Professional SP1”. If you have given a name like Windows XP (like I have given, in the below screenshot) or Linux Ubuntu 13.10, you are prone to getting an error while parsing the configuration file.
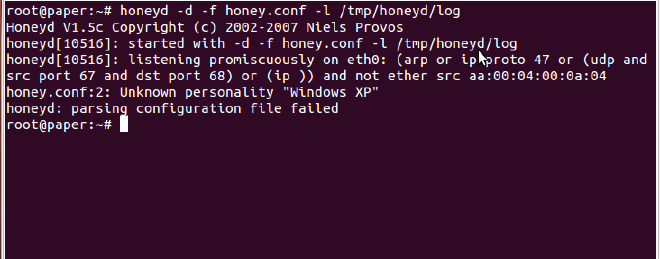
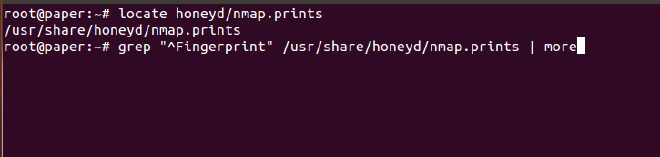
There are conventions for naming the personalities. There is a list of fingerprints (or names for such personalities) which should be used for naming the honeypot personality. The fingerprints are located in nmap.prints file. It uses the fingerprints which are identified by nmap scan, and hence when someone is scanning the honeypot, they will get the name provided by you.
Locate the nmap.prints file, with locate command. The you can use more to view the whole file, or if you simply want to view the fingerprints, use the grep command as shown in the below screenshot: (ref: Honeyd FAQ)
You can use any of the personalities in the list displayed by the above command. While sometimes, there is a need to specify the fingerprint file on the command line. The command should include -p <fingerprint.file> # honeyd -d -f honey.conf -l /tmp/honeyd/log -p /usr/share/honeyd/nmap.prints
Again, start your honeypot with a new personality.
Ping the honeypot from a remote machine. It will log everything, along with displaying it on the console.
Try doing FTP to your honeypot. It will show you the FTP login screen. (As usual, anonymous login is not allowed!) Let me know if you face any other problems in configuring your honeypot.
Conclusion: HoneyD is very easy to work with, and hence the choice of many. But some common mistakes like typo or proofreading can bug you till infinity. You mostly need to take care with the initial configuration.
Adios!